Tuesday, December 14, 2010

Happy Blogaversary!


Josh: Oh! Oh, what is this? Readers, did you plan this suprise party for Kandice and I? The balloons, the streamers! You remembered! We're so touched that you remembered our Blogaversary!

Kandice: It seems like only yesterday that we were posting our "Fish and Chips" post. Has it really been a whole year?

Josh: It has. Here's to another year of cutting, chopping, slicing, sautéing, frying, and failing.

Kandice: But in the meantime, Let's kick this party off with a few new recipes!

Bruschetta:

Josh: So for our appitizer, we decided to try one of my favorites, Bruchetta. Ah, my mouth is watering just thinking about it. Here's what you'll need:

6 or 7 ripe plum tomatoes (about 1 1/2 lbs)
2 cloves garlic, minced
1 Tbsp extra virgin olive oil
1 teaspoon balsamic vinegar
6-8 fresh basil leaves, chopped.
Salt and freshly ground black pepper to taste
1 baguette French bread or similar Italian bread
1/4 cup olive oil

The recipe says to use plum tomatoes because they have less juice and seeds, and they would be easier to use with this certain dish. We unfortunately couldnt find plum tomatoes, so we just used the same ammount of roma tomatoes, and it turned out just fine.

The first step would be to get some water boiling in a pot. Just enough for all of the tomatoes to be submerged. When the water starts to boil, take it off of the heat, and carefully drop the tomatoes in. Let them sit for one minute, then take them out. The water will have losened the skins a little, so that you can halve them and peel them.

Once they're all peeled, you have to take the middles out, so that you don't have much juice or seeds left, just the meat of it.

Next we preheated the oven to 450 degrees, making sure that there was a top rack placed in the oven. Next we minced the garlic, and chopped the tomatoes finely. We put them in a bowl with 1/4 cup of olive oil, then added the chopped basil leaves. From here, you can add salt and pepper to taste.

We then took our baguette and sliced it about 1/2 inch thick on a diagonal, so that we had pieces that looked like this:


From there, I brushed olive oil on one side of the bread, then I put the bread back on the pan, oil side down. Then, you just pop the pan in the oven and toast the bread for 5 to 6 minutes, or until the bread starts to get golden, crispy and delicious.

When they come out of the oven, flip them so that they are oil side up, and plate them. We plated them right before we ate them. We didnt want to let them sit, or they would get soggy. We had a little bruchetta station with the tray of bread, and the bowl of tomato, so that we could assemble them right there.

They were delicious. So very delicious...

Spicy Shrimp Pasta:

Ingredients:
4 cups Bowtie pasta
1 lb Pre-cooked shrimp
1 jar Tomato & Basil pasta sauce
1 tbs Olive oil
½ Red onion, diced
1 Red pepper, diced
1 Green pepper, diced
¼ cup Fresh parsley, finely chopped
1/2 tbsp Crushed red pepper flakes, or to taste
2 tsp Oregano
1 tsp Ground black pepper
1 tsp Garlic powder
2 cups Spinach, roughly chopped

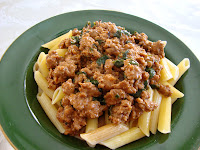
Kandice: So this recipe is one that Josh and I created a few weeks prior to making it for JK.

Josh: Yup. This was something that we just kind of threw together on the fly.

Kandice: To make the dish we first started cooking the BOWTIE pasta in a pot of boiling water.

…*Pause*… I remember one time when I cooked the sauce and forgot to cook the pasta! I felt so stupid.

Anyways, after starting the pasta we sautéed the red onion with the olive oil in a pan over medium-high heat. Then we added the green and red peppers.

Josh: After letting them sweat a little, we added in all of the herbs and spices. This included the: red pepper flakes, oregano, black pepper, garlic powder and parsley.

Kandice: We let this mixture cook for 2 to 3 minutes to allow for the flavors to fuse together. Here and there we sprinkled in a little water so that they peppers and onions didn’t stick to the pan. After a few minutes I added in the pasta sauce and turned down the heat to simmer.

Josh: While it was heating up, we added in the shrimp and the spinach. We let the sauce simmer for approximately 5 to 7 minutes. It smelt really good while it was cooking!


Kandice: By then the pasta noodles were finished cooking, so we strained them and put them back into the pot. Finally we combined the pasta sauce to the noodles.

Rosemary-Infused Watermelon Lemon-Limeade:

Ingredients:
1 cup Water
½ cup White sugar
1 sprig Rosemary, leaves stripped & chopped
¾ cup Lemon juice
¼ cup Lime juice
6 cups Seeded watermelon, cubed

Josh: So before we began any of the other dishes we started making our drinks. To start making the watermelon… lemon… lime… ade… we had to boil the water and sugar together in a small saucepan.

Kandice: Once the water started to boil, we turned down the heat on the burner and added in the rosemary to the water to let it steep... for 1 HOUR!

***Note: Steeping is to soak a solid (like tea or in our case rosemary) in a liquid at a temperature under the boiling point. This method is used for softening or extracting an essence from a food.***

*** 1 Hour Later ***

Josh: Once the rosemary was done steeping, I combined the lemon and lime juices and placed ½ cup of the mixture into a blender with half of the watermelon. I then strained the rosemary syrup through a mesh strainer into the blender.

Kandice: We pureed the mixture until smooth. Then we added the remaining watermelon and juice and blended the rest.

The drink itself was pretty tasty once we poured in to a glass of ice. It's definitely an unusual drink that you would have to try before knocking it down.

Kandice: It was a great year for JK. We've had a ton of fun making food, taking pictures, and brainstorming. We want to thank our readers for sticking with us for a whole year! Without you guys, we wouldnt be doing this. We hope you'll stay with us for another year, and maybe another one after that, even!

Josh: And as always, you can e-mail us anytime at jkdailyspecial@gmail.com, find us on our facebook fan page, and now you can post comments on our youtube video! Thanks for a great year! Here's how our meal looked all put together and pretty...


Oh, wait, something doesn't seem right...


Ah... That's better. :)

--------------------------
Recipies found on:
www.simplyrecipies.com
and

Wednesday, September 1, 2010

Pizza Pastime

To whom it may concern...

Kandice: Over the summer we got abducted!

Josh: We broke free long enough to make a pizza.

... Silence ...

JK!

Kandice: Sorry bad joke. :\

Josh: Anyways... we didn't get abducted. We've just been busy enjoying our summer.

Kandice: However, we did make a pizza!

Josh: It's a fun and easy thing to make with family and/or friends.

Here are some uncommon toppings that you should try:  Artichoke hearts , Avocado, Basil, Bay leaf, Cumin, Dill, Eggplant, Fish, Green peppers, Red onion, Roasted garlic, Roasted peppers, Shrimp, Spinach, and Zucchini.

Kandice: The ingredients that we used were: Tomato & basil sauce, Mozzarella cheese, Basil leaf, Button mushrooms, Peperoni, Green pepper, and more cheese!

Josh: On the crust we put melted butter and sprinkled garlic powder for extra flavor.

Kandice: We baked the pizza for 18 to 20 minutes at 400 degrees.


Josh: We had a lot of fun making pizza. Tons of toppings,  so many sauces, and dozens of dough styles make this deep dish a meal that everyone can find their own little slice of heaven, custom made to order. So what do you think? What's you're favorite pizza topping? Let us know!

We both want to thank our readers for sticking with us, even when we go months without posting. Feel free to comment, post, find us on Facebook, or even E-mail us at jkdailyspecial@gmail.com. Thanks for reading, and we hope you check back soon!

Friday, April 16, 2010

Champion of Cheesecake Challenge

Kandice: Hey, remember us?

Josh: We live!

Kandice: We want to thank you all for being patient while we had a little...unsceduled hiatus.

Josh: Between Kandice's schedule change...

Kandice: ...and Josh being sick...

Josh: (Flu and double ear infections... I didn't want to touch anyones food.)

Kandice: Not to mention we had 2 major snowstorms before all of that. We really kinda had no time to get things done.

Josh: But now we're back, so you can stop rioting in the streets now.

Kandice: We have a few recipes planned out and lined up, so we have plenty of material to throw at you.

Josh: And today, for this post, we decided to set it up slightly different.

Kandice: For the first time in JK history we're going to let you, the reader, vote on your favorite dish.

Josh: We wanted to try something a little more... 'contest-ish'. Is that a word?

Kandice: No.

Josh: Okay.

Kandice: So today, we're going to present you with two recipes with two pictures of the finished product.

Josh: Each of us chose a recipe, made the dish, and designed and plated however we saw fit.

Kandice: So what we're asking of you, is to vote on the dish you like best. You can base your vote on the recipe, the plating, the taste (if you make the recipe), and/or any other criteria you see fit.

Josh: We might end up doing this type of thing more in the future, so any feedback is greatly appriciated.

Kandice: For this week's dish we both made a cheesecake. Please check them both out and then comment on the blog, vote in the poll, or comment on our facebook page, telling us which one you think is best!

Josh: So please help us decide which of us is the CHAMPION of CHEESECAKE!

(Recipes and pictures will be labeled either 'A' or 'B', so when you vote, you can just state a letter instead of trying to describe the cake you're voting for. As always, comments, questions, suggestions, and the like are all welcomed, even if you dont vote.)

Italian Cream Cheese Cake with Raspberry Sauce

Ingredients:

Cream Cheese Cake:
2 cups graham cracker crumbs
8 tbsp butter, melted
2 cups ricotta cheese
8 oz cream cheese, softened
5 eggs
¾ cup sugar
½ tsp salt
1 ½ tsp vanilla extract

Raspberry Sauce:
12 oz fresh raspberries
1 tbsp sugar
1 tbsp brandy

Directions:

Preheat oven to 350. Grease a 9-inch spring form pan; set aside. Mix together all of the ingredients for the crust: the graham cracker and butter, and press into the bottom of the pan.

Beat the ricotta cheese and cream cheese together until smooth. Add the eggs, sugar, salt, and vanilla, and mix well.

Pour the filling into the prepared pan and bake for 1 hour and 20 minutes or until center is set. Remove from oven and allow to cool.


For raspberry sauce: In a food processor, combine berries, sugar, and brandy. Process until smooth. Place in a bowl and refrigerate. Spoon the raspberry sauce over the cheese and cut and serve.


Royal Raspberry Cheesecake

Ingredients:

Crust:
3/4 cup all-purpose flour
3 tablespoons sugar
1/2 teaspoon finely grated lemon peel
6 tablespoons butter
1 egg yolk, lightly beaten
1/4 teaspoon vanilla extract

Filling:
3 (8 ounce) packages cream cheese, softened
1/2 teaspoon finely grated lemon peel
1/4 teaspoon vanilla extract
1 cup sugar
2 tablespoons all-purpose flour
1/4 teaspoon salt
2 eggs
1 egg yolk
1/4 cup milk

Raspberry Sauce:
12 oz fresh raspberries
1 tbsp sugar
1 tbsp brandy

Directions:

In a mixing bowl, combine flour, sugar and lemon peel. Cut in butter until crumbly. Stir in egg yolk and vanilla. Pat 1/3 of mixture on the bottom of a 9-in. springform pan with the sides removed. Bake at 400* for 7 minutes or until golden; cool. Attach the sides of the pan; pat remaining crust mixture 1-3/4 in up the sides. Set aside.

For filling, beat cream cheese, lemon peel and vanilla until fluffy. Combine sugar, flour and salt; add to creamed mixture, beating well. Add eggs and yolk; beat at a low speed just until combined. Stir in milk. Pour into crust. Place on a shallow baking pan in oven. Bake at 375 degrees F for 35-40 minutes or until center appears set. Cool for 15 minutes. Loosen sides of cheesecake from pan with a spatula; cool 30 minutes. Remove sides of pan; cool 1-2 hours longer. Chill thoroughly.


Meanwhile, for sauce, combine all ingredients in a food processor. Process until smooth. Place in a bowl and refrigerate. Just before serving, top cheesecake with sauce and whole berries.


Josh: So there we go. Both recipes and directions… with pictures included! What more could you want?! Now it's as simple as letting us know which one you think is overall better. Let us know in any way you want. You can send us a vote, explanation, or a rating system. Like stars or something. They seem to work well for movies and cars. Why not cheesecake?

(Note: We will refer to the first recipe as 'Cheesecake A', and the second recipe as 'Cheesecake B'.)


Kandice: Thanks again for reading and commenting! You can always reach either of us from our Facebook fan page, or E-mail us! jkdailyspecial@gmail.com.

Keep a watch out for a new special!

Thursday, February 18, 2010

Sloppy Noodles


Ingredients:
1 clove garlic, minced
1/2 onion, diced
1 lb ground turkey
1 1/2 tbsp ground cumin
1 tsp black pepper
2 tbsp BBQ sauce
1 tbsp sour cream
1 tbsp parsley, finely chopped
2 cups spinach, roughly chopped

Kandice: Ok, ok. The name of this recipe does not sound the most appealing or appetizing, but hear me out. The day that I created this recipe I had a real hankering for some noodles and a sloppy joe (or steamer as some people call it). I didn’t want the extra calories from the buns of the sandwich, so I thought that I would try creating a sloppy joe mixture and put it on my penne pasta. Thus the creation of Sloppy Noodles came to be.

It’s actually very good despite how the name sounds. To make Sloppy Pasta I first minced the garlic and chopped the onion and placed them in a bowl together. In another bowl I combined the spinach and parsley. Preparation done; simple right? Then over medium-high heat, in a non-stick pan I poured a little oil and added the onion and garlic mixture. I sautéed these ingredients until they were slightly browned. Next I added the ground turkey and spices. Once the turkey was fully cooked I poured on the BBQ sauce. I let the flavors of the BBQ cook into the turkey a little before I added the sour cream. After combining the sour cream into the pan, I stirred in the parsley and spinach. I cooked the spinach until it was wilted, which was approximately 2 – 4 minutes. Once the spinach is cooked, I served my “sloppy joe” over some noodles.

If you or your family enjoys sloppy joes then this is definitely a recipe for you. It is very simple and quick recipe to make. Everyone will love it. I made this recipe two times over the week. The second time I made it I added some green beans into the mixture to add more greens. This is recommended, but for those who don’t like green beans it is optional. I do hope that you enjoy this sloppy recipe. ^_^

Monday, February 8, 2010

Blizzard of 2010


Hello, everyone. Josh here. Kandice and I decided to post a little update to let you guys know what's going on with our lives outside of recipes and baking.

As a lot of you may have heard, the Northeastern USA was hit with a ton of snow recently. Kandice and I live in Pennsylvania and Maryland, respectively, so we got buried. We both got around 2 FEET of snow! It was so much snow that we could barely see our cars! Kandice and I were both lucky because we stayed up and got to watch the storm as it was progressing. In the morning, Kandice went outside and took some nice pictures of all the snow. She told me that, while she was walking around, the snow came halfway up her thighs! She also stated that it took her 45 minutes to go down to the park near her house and back when it’s normally a 10-15 minute walk. Seriously, this was some really deep snow!

Luckily it stopped snowing in the afternoon and the sun came out. The sun didn’t melt much snow so there’s still a lot of it out there. It’s all very beautiful. Kandice and I hope to go snow tubing here soon; though we still have to unbury our cars before we can go anywhere. But when we do we’re going to go tubing, build snow forts, and have a snowball war! We hope that you enjoy the pictures and if you’re anywhere near us look us up you can join in our war.


Kandice's car : \

Saturday, February 6, 2010

Four Colorful Smoothies

Josh: What is something good to drink when you’re on-the-go or when you just want to relax? Smoothies!

Kandice: Smoothies aren’t something you would normally think about making during the dead of winter, but they’re a great way to jump-start your morning or brighten your day. They bring vivid colors and fresh flavors to your kitchen.

Josh: Normally when I think about having a smoothie, I think of the summer, but I also find that they provide a nice way to cool down and relax after a good workout. The added bonus is that the fruits and/or veggies within the smoothie will provide me with a renewed boost of vitamins and energy.

Kandice: I like to have a smoothie in the mornings for breakfast. Usually I’m not a big breakfast person and unfortunately I’m allergic to eggs, so that makes choices for something to eat in the morning fairly limited. When I have the time, I will eat a small bowl of Special K or Life (totally my favorite!) cereal. But when I’m busy, which is most of my time, I will make a smoothie.

Josh: Smoothies are fairly simple to make. All you really need to have is a blender and some fruits and/or vegetables. For making smoothies, it’s all about the combinations that you create. Some fruits have a strong taste to them while others don’t. The key to making them is to create it so that all of the individual flavors blend into one giant, delicious flavor that “wows” your taste buds!

Kandice: Everyone’s different and we all like different flavors. Josh and I really like our fruits so we decided to provide you with a colorful array of smoothies that all have their own unique taste. We hope and encourage you to try them out.

Acai & Fruit Smoothie

Ingredients:
8 oz. Acai juice
8 oz. Soy milk
1 Banana, cut in chunks
8 oz. (approx 14) Strawberries
1 Peach, seed removed
8 oz. Blueberries

Josh: This recipe came from the show Good Eats, hosted by my idol, Alton Brown. We altered it just a little because we unfortunately forgot to add the peach. Oops. Yet, in spite of our mistake the smoothie still came out very good.

Groovy Green Smoothie

Ingredients:
1 Banana, cut in chunks
1 cup Grapes
1 (6 ounce) tub Vanilla yogurt
1/2 Apple, cored and chopped
1 1/2 cups Fresh spinach leaves

Kandice: When I first came across the recipe for this smoothie I was like “OMG! It’s green … and it has spinach?!” Spinach is definitely not something I would have ever considered to include in a smoothie, but I figured that I would try it anyways. When Josh and I made this smoothie we combined all of the ingredients into our blender and mixed them until smooth. One thing that we had to remember to do, while we were blending everything, was to use a spoon to push down the spinach that kept sticking to the walls of the blender. Once it was done we had a taste test. I found that the smoothie is actually pretty good. It’s clearly a way to disguise eating your spinach for those of us that don’t particularly care to eat it. : )

JK's Mango Delight

Ingredients:
1 cup Soy milk
1/4 Papya, seeds removed
1 Mango, peeled 
1 Banana, cut into chunks


Josh: This one we decided to go tropical. It turned out really well, and It's definately one of my favorites. If you wanted to, any tropical fruits such as Kiwi, Nectarine, or passionfruit would make a great substitiution or addition. Make sure to pit the mango and deseed the Papya. I'm sure this is common knowlege, but just in case.

Strawberry Oatmeal Breakfast Smoothie

Ingredients:
1 cup Soy milk
1/2 cup Rolled oats
1 Banana, cut into chunks
14 Frozen strawberries
1/2 tsp Vanilla extract
1 1/2 tsp White sugar

Kandice: Out of all of the smoothies I’d have to say that this one and JK’s Mango Delight are my favorites. I love this one because it’s a terrific “on-the-go” breakfast treat. The oatmeal within the recipe makes it truly filling. The only thing that I could recommend that would improve this recipe would be to use more strawberries.

Josh: You can't go wrong with smoothies. It's basically endless possibillities.

Kandice: Like bananas and blueberries? Put them in a smoothie and build flavors around that.

Josh: Or something mroe tropical, like we did.

Kandice: We really hope you'll try some of these, and make some of your own!

Josh: We'd love to hear about your smoothie recipes. Feel free to comment, or send us an E-mail at jkdailyspecial@gmail.com!

Thanks for reading!

Sunday, January 31, 2010

Chinese Food Failures

Kandice: This week’s post will not be the greatest post that JK publishes. Tonight was a night of epic mistakes and failures. Let me just say, that tonight Josh and I failed to appeal to our hunger for Chinese cuisine.

Josh: About a month ago, Kandice and I had come up with the idea to make sushi for our audience. We knew that sushi is a popular dish, so we wanted to try our hands at it.

Kandice: But I’m not a big sushi fan; to me it tastes too much like the salty ocean. So to go along with the Chinese theme of our main dish, I thought that it would be best if I made a second “main dish” and side dish that would go along with both recipes.

California Sushi Rolls

Josh: Food preparation is all about art. From prep to presentation, every move is important, and every second counts. A real chef not only creates wonderful flavors through seasoning, herbs, and spices, but also through the colors, shapes and arrangement of the food that they create. Heck, that's why it's called "Culinary ARTS."

One of the most artistic foods out there is sushi. When done correctly, sushi is a beautiful statement on a blank plate. Notice I said, 'When done correctly". Unfortunately, tonight, things weren't so correct.

Ingredients:
2 cups Uncooked Sushi Rice (approx.)
2 2/3 tbsp Rice Wine Vinegar
1 Avocado
1 Cucumber
5 oz. Crab Leg Meat
Nori Sheets
Lemon Juice

Sushi seems easy to prepare. Everything's raw, right? Simple. It should be simple. It really should. I thought exactly that when I said in one of our brainstorming sessions, "Yeah, I'll do sushi."

I should have done some research.

The only thing that really gave me a problem was the rice. I'm not going to include any cooking instructions for it, but only because we saw many different instructions. The instructions varied from box to box, so if you just follow the steps on your particular box you should be fine. The box I bought had a whole page worth of instructions on the back of the box. No joke. Cook for 15 minutes, and then 2 minutes, and then 5 minutes, and then set for 15 minutes, and then let steam for 15 minutes. Blah blah blah. I was so frustrated that it would take me a week to even finish the rice!

But while the rice was doing its thing on the stove, I prepped the other ingredients, which fortunately didn’t take too long. The first thing I did was I halved and pitted the avocado. Then I sliced it to make a lot of thin strips. For those of you who haven’t really worked with avocados before, like me, you will want to find avocados that have a gentle give when you squeeze them. I know it sounds the least bit helpful, but when you find a good one you'll know. Also, when avocados are cut they brown really easily. To help prevent this put some lemon juice on the cut slices. This will help keep them from browning for a little longer.


When the avocados were done, I began preparing the cucumber. This was very easy. All that needed to be done was to cut the ends off and then continue to halve it lengthwise until you have small, thin strips. This same technique applies to the crab meat sticks.

Once all the prep work was done, I waited on the rice. My instructions told me not to lift the lid AT ALL until it was finished cooking. I had no idea at all if I was even cooking it right. Thankfully, the rice came out just fine. I then scooped all of the rice into a bowl and sprinkled the rice wine vinegar over it. You have to cut the vinegar into the still hot rice, which is basically the same principal as folding ingredients into each other, but with more... vigor. I also needed a fan so that I was cooling the rice as I was introducing the vinegar. In the end, the rice tasted great.


Now the fun begins. I got a large bowl of water, to keep the rice from sticking to my hands, and began to spread some of the rice onto a rolling sheet that I got. It looks like a long page of skewers strung together. I don't think it's needed, but it was nice to have it. After a layer of rice, I cut a nori sheet in half and put it on top of the rice. After another layer of rice, I added a strip of crab, some avocado, and a strip of cucumber and began to roll it all together.

It is very important to think about how much you're adding to your roll. You want a THIN layer of rice. Believe me. I learned this the hard way, and ended up with this:


I call it, ROLLZILLA!

After you make sure it's all nice and neat, you can carefully cut the roll into sushi sized pieces. Then, all that's left to do is add soy sauce or wasabi and enjoy!


Chinese Lemon Chicken

Ingredients:
2/3 cup Fresh lemon juice
1 tbsp Soy sauce
2 tsp Cornstarch
10 oz Boneless, skinless chicken
Fresh herbs
1 tbsp Honey

Kandice: I first came across this recipe in our 100 Calorie cookbook and I thought that it would be a simple and delicious recipe to make. It certainly looked good by the picture. The first step to creating this entre was to cut the chicken into bite sized pieces and place them into a bowl. Then in another smaller bowl I whisked together the lemon juice, soy sauce, cornstarch, and honey. The honey was an additive; it was not called for in the original recipe. I added it to try to balance out the lemon flavor. This mixture was then added to the chicken and set aside to marinade in the fridge for 15 minutes.

Once the chicken was done marinating, I tossed it and the remaining sauce into Josh’s brand new wok. I cooked the chicken for approximately 10 – 12 minutes on medium-high heat. It smelled good coming off the stove, but when Josh and I went to taste the chicken we were met by a strong, bitter taste. The lemon totally overpowered any other flavors within the meal. While I was chewing my piece of the chicken, I kept on thinking, “Oh my gosh, this is disgusting! It needs more honey!” Come to think of it, what would it have tasted like as the original recipe (without the honey)?! I don’t know what it would have been like, but I’m sure glad that I modified the recipe in the first place.


Some recommendations that Josh and I can promote would be to add more honey! Approximately another tablespoon and a half would help this recipe a lot. Another ingredient that would have been good to add to the recipe would have been sesame seeds. Adding the sesame seeds while the chicken is cooking would toast them and add a nice crunchy texture. Josh and I both urge you to try these modifications if you are to make Chinese Lemon Chicken.


Lo Mein

Ingredients:
1 lb. Chinese egg noodles
3 ½ oz Bean sprouts
½ Carrot
4 Cabbage leaves
2 tbsp Cooking oil
6 tbsp Soy sauce
4 tbsp Sugar
4 tbsp Sake

Kandice: For the side dish I wanted to go with a classic; something that could be found at most Chinese restaurants. For this reason, and because of the fact that I really enjoy it, I choose to cook Lo Mein.

The first thing that I had to do was to prepare the carrot, cabbage, and bean sprouts. With the carrot I peeled the outer skin off and thinly sliced the rest of the carrot. For the preparation of the cabbage I cut out the cores of the leaves and set them aside. Then, using the easiest way, I cut the cabbage into strips by stacking the leaves together. I used the cores of the leaves by cutting them into thin slices, like the carrots. Finally, I rinsed off the bean sprouts using nice cold water and a strainer.


Once all of the vegetables were done, it was time for me to make the sauce. To make the sauce I whisked together the soy sauce, sugar, and sake. I’ve never had nor smelt sake before, so when I popped open the bottle it had a really strong smell to it. It almost made me gasp. I still haven’t tasted the flavor of the liquor yet, but I do know that it kind of smells bad. (At least Josh and I think so.)

Finally, it was time to do some cooking, but that’s when things went wrong again. See in the recipe it said to use Chinese egg noodles. Well, the store that Josh and I had gone to didn’t have “Chinese” egg noodles. They just had regular egg noodles. We went ahead and bought these figuring that there wasn’t too much difference, just their shapes. We eventually found out that we were wrong. See, the recipe called for us to steam the noodles before cooking them with the other ingredients. So I steamed them until they were flexible, just like instructed. But when I went to combine them with all of the ingredients into the wok, they didn’t continue to cook and soften like I thought they would. So when everything else was finished cooking in the wok, the noodles were still slightly hard or a little too al dente. The dish, itself, looked and smelt great, but when it came to eating it … well … let’s just say that it didn’t exceed standards.


In the future when making this dish, I know now that it’ll be best to just boil the noodles in a pot of water. Once they are done, I will strain the water off and toss them with a little vegetable oil to keep them from sticking together.


Josh: In the end, our culinary trip to the east didn't turn out so great...

Kandice: But it was a learning experience, so we're okay with admitting defeat.

Josh: ... My sushi was the best dish.

Kandice: What?!

Josh: Nothing! We hope you enjoyed readi-

Kandice: What did you say!

Josh: Check back next week for another dish!

Kandice: JOSH!

Josh: Buh-bye!

Saturday, January 23, 2010

Textures, Flavors, and Smells of Bread

Josh: Bread. Could we be any more vauge?

Kandice: There's so many flavors and styles of bread! There are almost infinate possibilities!

Josh: We could probably create a whole new blog and fill that with just bread recipes.

Kandice: Seriously. Anyway, this week, we decided it would be fun to make some breads and post them on the blog.

Josh: We've got 3 easy recipes for you guys to try.

Kandice: All of them were awesome, and are in no particular order.

Lemon Zucchini Bread

Ingredients:
1 1/2 cups shredded zucchin
3/4 cup white sugar
1 egg
1/2 cup vegetable oil
1 1/2 cups all-purpose flour
1/2 teaspoons salt
1/2 teaspoons baking soda
1/4 teaspoons baking powder
1 teaspoon ground cinnamon
2 teaspoons lemon zest

Josh: Usually, when Kandice and I go out and get ingredients, we get back to one of our houses, and go, "Oh. We forgot -----." Skewers from the Kabob Recipe, Cumin from the Quesadilla Recipe... and every time, I would get back in my car and run back out to the supermarket. We may have spent more money on gas then on the food itself!

Kandice: But this time, when we realized that we forgot the cupcake papers, I dropped Josh off at his house and then I went back out to the store.

Josh: ...You took forever!

Kandice: Whatever! I had issues come up. (nods)

Josh: Sure ... Anyways, while she was gone, I began the prep work. First I shredded the zucchinis with what may or what may not have been a very large zester. Either way it did the job. I also prepared the flour mixture that consisted of: flour, salt, baking powder, and baking soda.

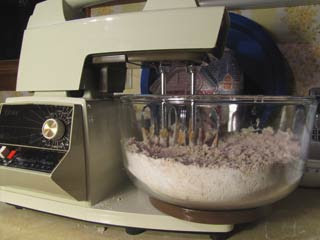
Kandice: By the time he was finished, I had gotten back from the store and had combined the sugar, eggs, and oil in another bowl. We then added those ingredients to the zucchini and beat them together using "Josh's Stand Mixer". (This is a really, really old stand mixer. I mean this thing had to have been at least 50 years old! Haha) I then zested the lemon while Josh measured out the cinnamon. We both added these to the flour mixture.


Josh: Then, the only thing to do was to combine the dry ingredients to the wet ingredients while mixing.

*** Note: It is always best to add dry mixtures to wet ingredients slowly so that you don't make a big mess when you turn on the mixer. ***

Kandice: When it had a doughy consistancy, we took it out and I spooned the batter into cupcake papers. Of course, that was just our method of choice. This easily works as a loaf, too.


Josh: Then we threw it into our 325 degree hotbox and kept an eye on it for awhile. We had doubled the recipe and used cupcakes instead of a loaf. It took about 30 minutes or so for them all to bake correctly or until a toothpick came out clean when inserted into the tops of one of the cupcakes.

Kandice: The original recipe calls for a 45 minute bake time for a loaf of the recipe we posted, but it's just best to keep a constant watch on it.

Josh: In the end, it turned out really well! I had never had zucchini bread before, and I was pleasantly suprised. Haha. We had plenty of leftovers after we divided it all up between our family and friends.


Peanut Butter Bread

Ingredients:
Cooking spray
2 cups All-purpose flour
½ cup Sugar
2 tsp Baking powder
1 tsp Salt
1 cup Creamy peanut butter
1 large Egg, beaten
1 cup Milk

Kandice: To make the Peanut Butter Bread was actually quite simple. First I mixed together the dry ingredients: the flour, sugar, baking powder, and salt, in a large bowl. Next was my favorite part; adding in the peanut butter. Peanut butter is so good to eat. Sometimes I just eat it directly from the spoon. Don’t worry! I didn’t do that this time; even though I was tempted. After cutting the peanut butter into the dry mixture, I stirred in the egg and the milk. I then ladled the batter into individual muffin cups.


We then baked them for about 25 minutes. We had to keep checking them because the recipe that we were following called for the batter to be baked in a bread pan, not muffin cups. But I’d have to say that they came out pretty well. They are the best with raspberry preserves on top, however, josh preferred to have them plain. These would definitely make a great breakfast or lunch item. Who doesn’t love PB&J?!

Josh: I love making bread. I love the smells, the textures, and especially, the final product. I havent been cooking for too long. I just recently got really into cooking over the past year. I've always enjoyed it, but until recently I've never really done much. This Banana Nut Bread recipe was one of the first baking recipes I've done. I love this recipe. The bread is so good! So I've decided to share it with you.

Banana Nut Bread

Ingredients:
4 Bananas
1 cup sugar
1 teaspoon vanilla
1 1/4 teaspoon baking powder
2 eggs
1/4 cup butter
2 cups flour
1/4 teaspoons baking soda
1/2 cup chopped walnuts

Josh: The first thing I did is preheat my oven to 350. While the oven is preheating, I normally peel, slice, and mash the 4 bananas in a big bowl, but this time I let Kandice do it for me. At least she didn't make a mess. Haha.


Anyway, While she was mashing away, I put the sugar, baking powder, baking soda, flour, and the finely chopped walnuts in a big bowl. I put everything else in the stand mixer and beat those ingredients together before I slowly added the dry ingredients. It takes a few minutes to get everything added, but once it was, I just spooned them into the paper cupcake holders and popped them into the oven.

Depending on the size and shape of your bread, the timing may be different, so I just kept an eye on my breads. Basically I just kind of winged it by continually checking on them with the toothpick method.

When they were finally finished, I took them out and let them set for a little bit before doing anything with them. And there, I had Banana Nut Muffins. I love them. They're amazing with just a little butter on them or, as I like them, just plain right out of the paper. Enjoy!


We really hope you guys enjoy these breads. We know we enjoyed making them. We'd love to hear from everyone to see what kind of changes you would make, what other breads you like to eat or make, and what disasters you've had. Don't pretend like you haven't had any! Everybody does at some point in time.

Please leave us a comment or e-mail us with suggestions, stories, or recipes at jkdailyspecial@gmail.com. And if you like what we do, please subscribe to us!

Thanks again for visiting our blog. We hope you'll be back next week for a new recipe!